
Week-9 Dealing with Social Media, Building a WordPress powered website
Building a Social Website with WordPress
BuddyPress is a WordPress plugin that helps you create and manage social networks so that users are able to interact and communicate with each other in a very intuitive way. A set of plugins adds specific features that you can mix-and-match to customize the network as per your requirements.
This tutorial will help readers install WordPress BuddyPress themes and set up a BuddyPress compatible theme. By the end, the readers will have a simple social networking website that is ready for business.
Table of Contents
- Install a WordPress Theme
- Install the BuddyPress Plugin
- Configure the Plugin
- Use BuddyPress with Theme
- Create a Menu for Nav Bar
- Enable Registrations on Website
- Set up the Front Page
Step 1: Install WordPress Theme
I’ll select a simple and basic social theme for the sample website. For this tutorial, I will use the Quest WordPress theme. To install the theme, navigate to Appearance → Themes and search for “Quest”. Next, click the Install Button as shown below.
Step 2: Install the BuddyPress Plugin
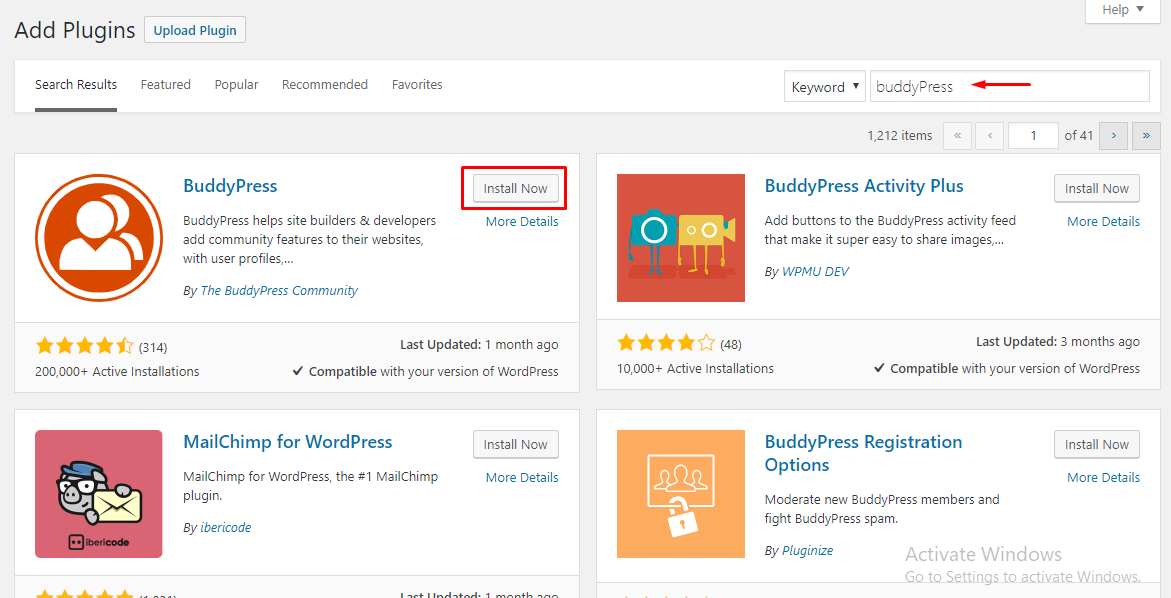
Go to WordPress Admin Panel, navigate to Plugins → Add New → search for BuddyPress in the search box at the top right. Once you have found the plugin, click the Install Now button.
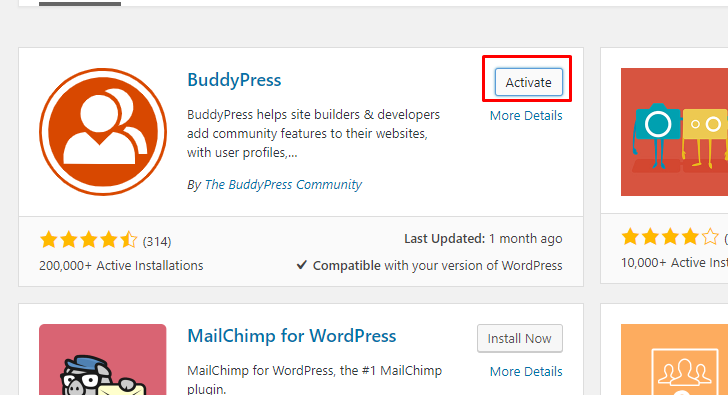
Once the process finishes, Activate the plugin.
Next, I will now configure BuddyPress plugin to use it with the Quest theme.
Step 3: Configure the BuddyPress Plugin
Navigate to Plugins → Installed Plugins → BuddyPress → Settings.

You will notice one credits tab and three option tabs through which you can configure WordPress BuddyPress according to your needs.
1. Components
These options allow the site administrator enable (or disable) actions that directly impact how the users interact with other users of the social network.
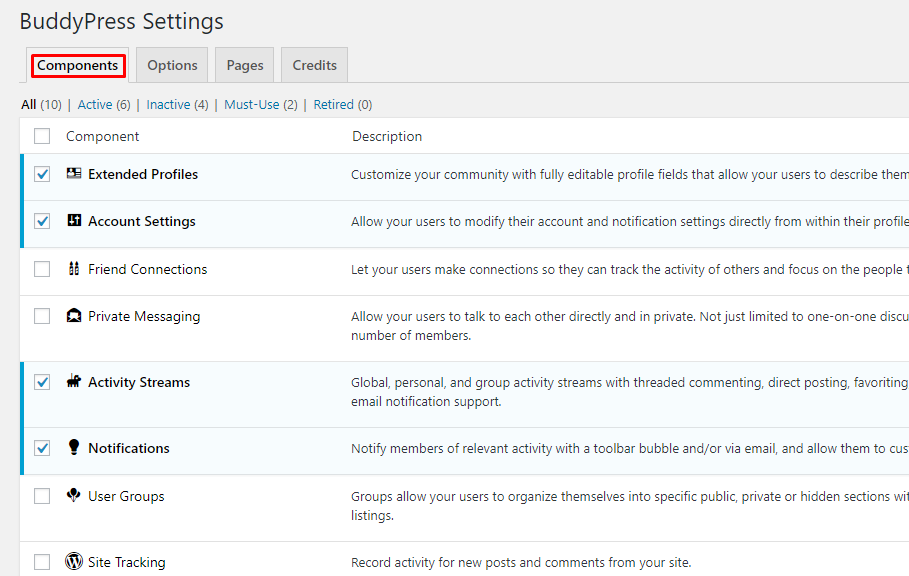
- Extended Profiles: When enabled, you can add custom fields to the user profile.
- Account Settings: Checking this item allows users to change their account and notifications directly from the profile screen.
- Friend Connections: When enabled, users can send friend requests to other site users. If the request is accepted, users can monitor each other via the activity log.
- Private Messaging: When this option is enabled, users can send private messages to other members both individually and in a group.
- Activity streams: This option allows users to see activities of their friends on the social website including threads, comments, mentions, direct posting and favoriting. Users are also notified via email.
- Notifications: This option allows users to receive instant notification of friends’ activities, including friend requests, private messages etc.
- User Groups: This option let the users create public, private or hidden groups of nature.
- Site Tracking: When enabled, records activity related to new posts and comments.
2. Options
These options add to the user experience by allowing (or disallowing) actions by registered users.
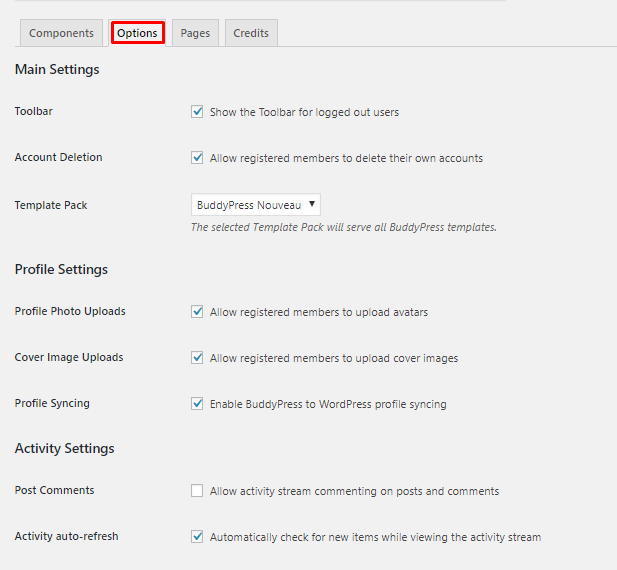
Activity auto-refresh
The most widely used feature of social networks is the auto-refresh of news feeds so that users do not have to refresh the view again and again to get new updates. By default, this option is enabled so that the logged-in users are notified when a new post or comment is shared.
Profile Syncing
This option allows users to link their WordPress profiles with their BuddyPress profiles.
Post Comments
When enabled, users can add their comments to posts and comments on their activity stream.
3. Pages
This is the most important section for your social site.
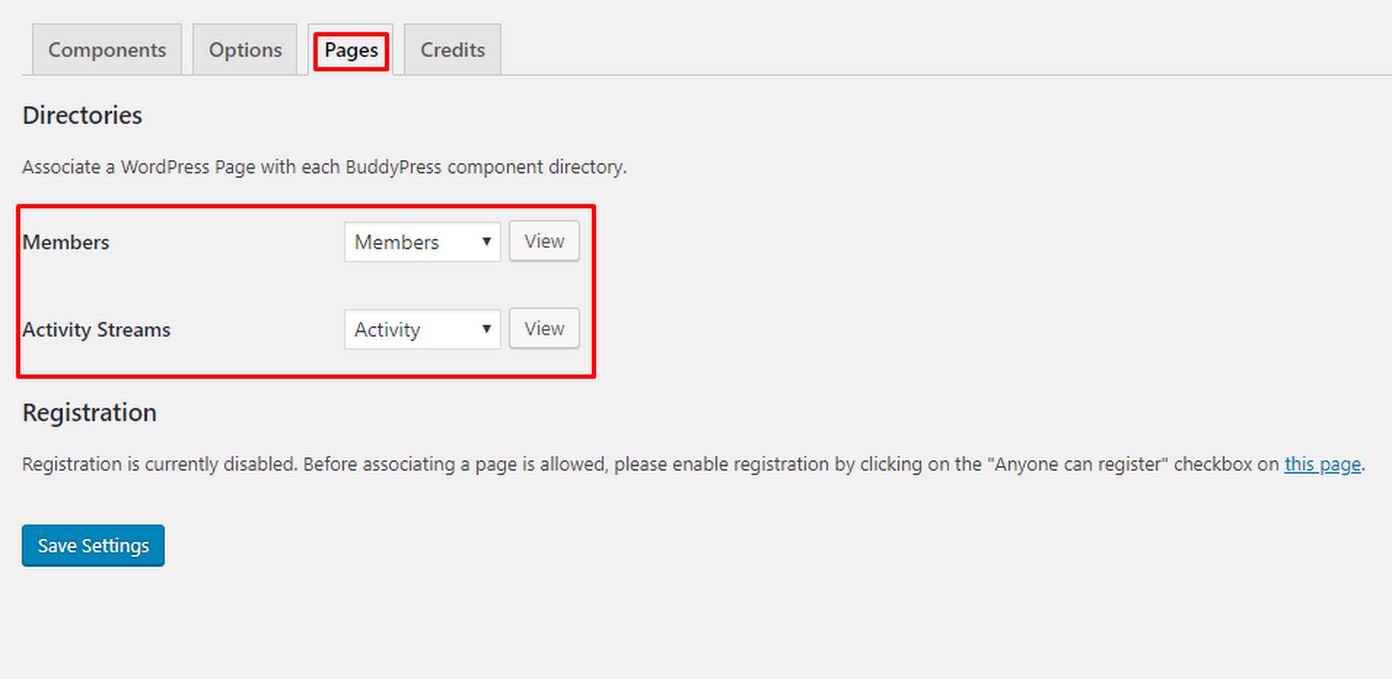
Although this tab is pretty simple, many BuddyPress users get confused. Let me help you understand these three labels:
- Members
- Activity
- User groups
Note: When in doubt, go with the default settings for these labels.
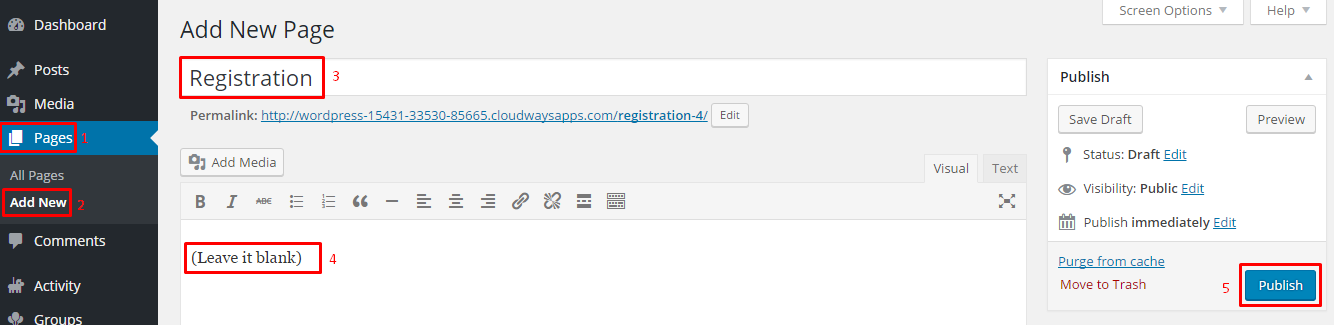
Now, I will create Registration and Activation pages.
Register
In BuddyPress, this is the default Registration form. BuddyPress needs a page to assign its sign up form. That’s why I need to add a new page from my WordPress admin panel
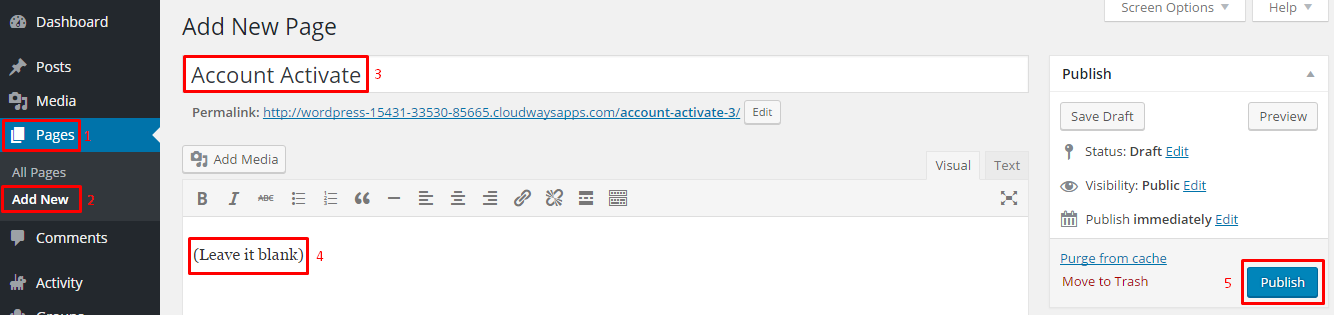
Activate
This is also a default account activation process of BuddyPress. For this, I have to create a new page again by going to WordPress admin panel and adding a new page.
Create Registration & Account Activate Pages
Create the “Registration” page by navigating to Pages → Add New.
Create “Account Activate” page by navigating to Pages > Add New.
Now, navigate to Settings → BuddyPress → Pages.
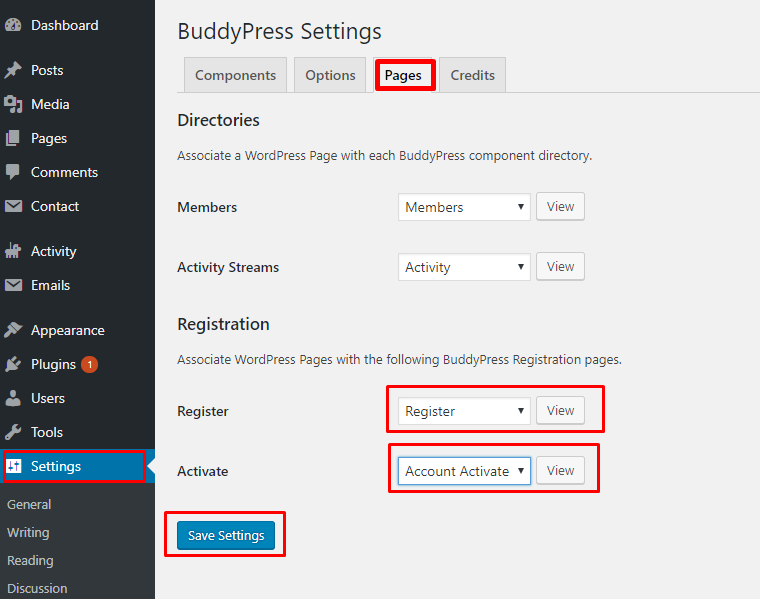
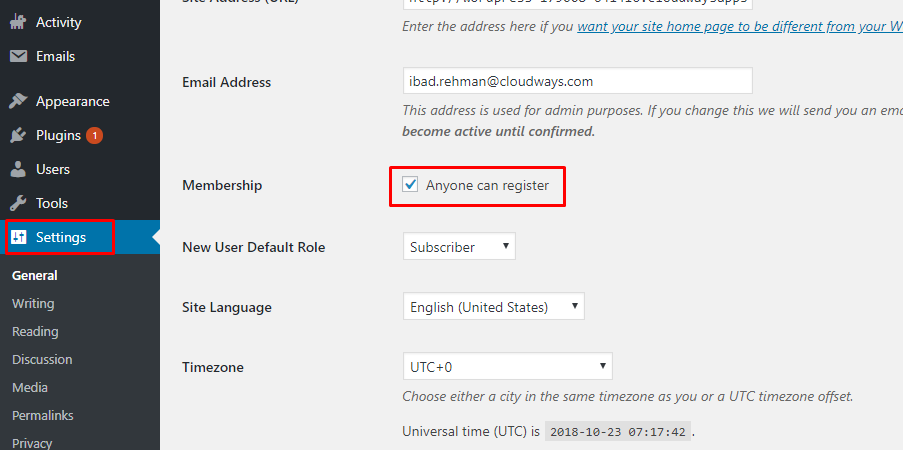
Note: If these options are not visible, navigate to Settings → General and enable “Anyone can register” option.
Finally, click “Save Changes” button at the end of the page.
Step 4: Using BuddyPress with the Theme
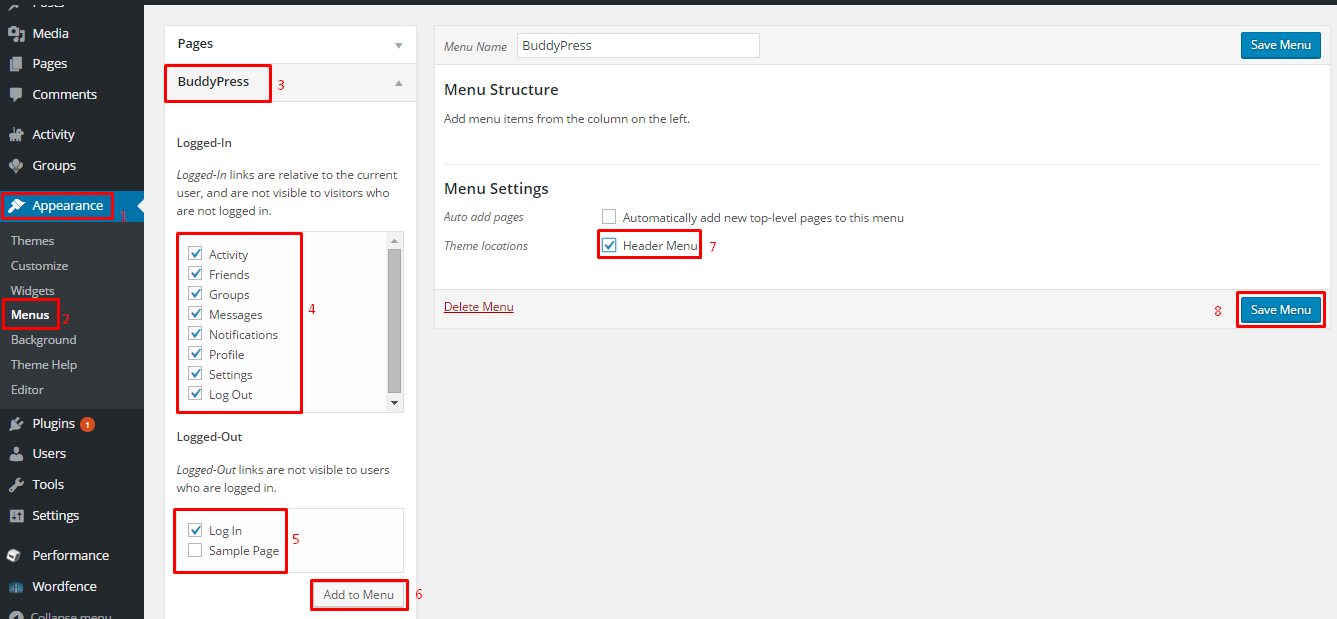
Go to Appearance → Menus. Open Screen Options from the top right corner.
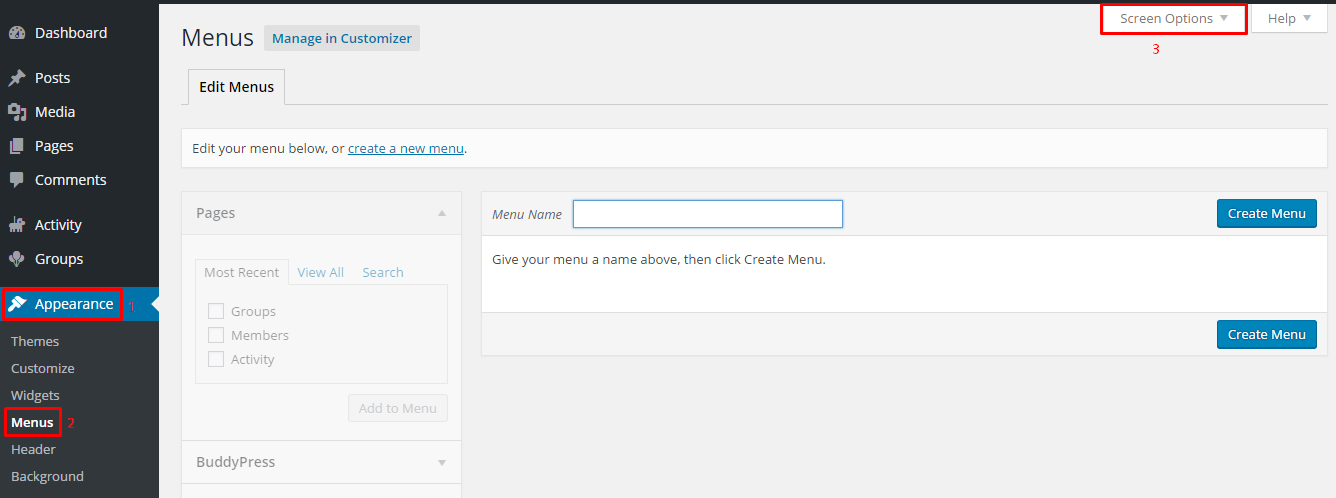
Make sure you have marked BuddyPress.

Step 5: Create a Menu for the Nav Bar
Note: If you already have a menu bar, delete it before continuing.
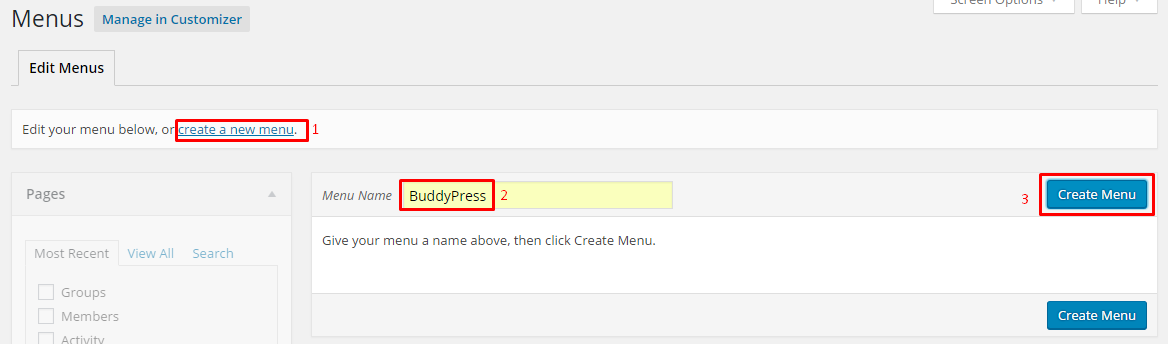
Follow these steps to add a new menu bar.
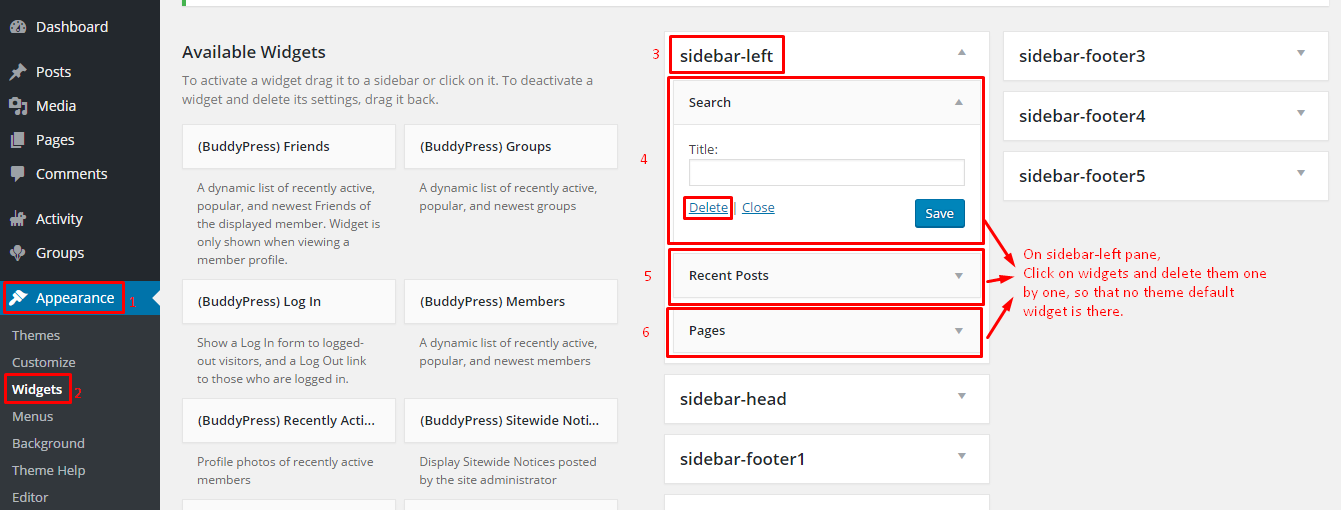
Remove the theme default widgets, and configure them according to your need.
Add BuddyPress widgets to the sidebar.
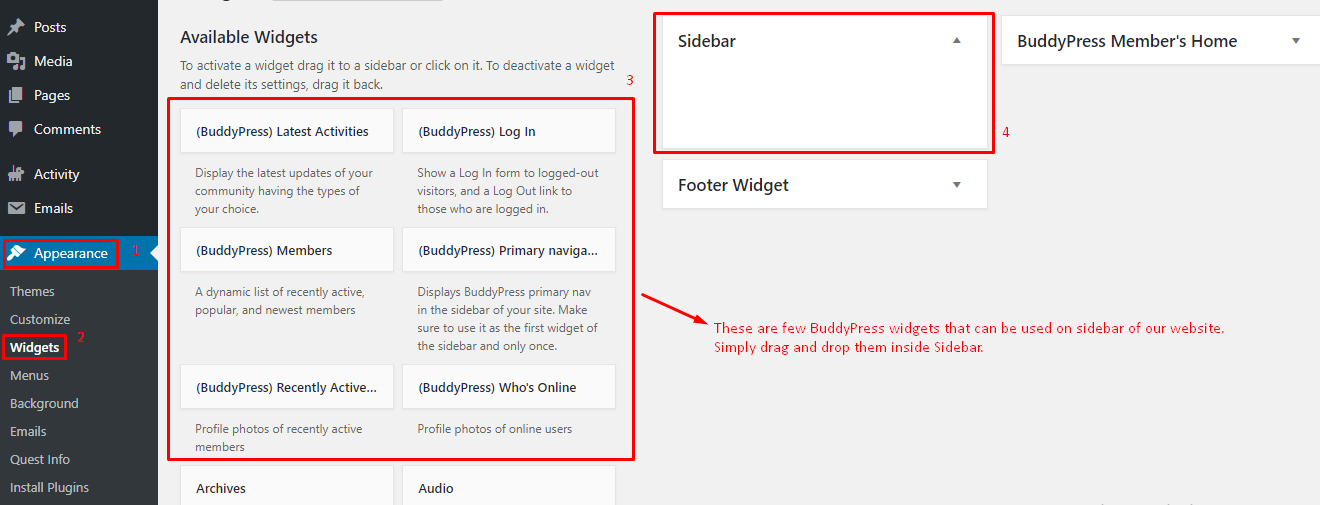
(BuddyPress) Login: This widget incorporates BuddyPress login functionality. The widget presents the login form in the side menu bar.
(BuddyPress) Latest Activities: This widget shows the recent activities on the BuddyPress site, allowing the users to follow what’s trending in the community.
(BuddyPress) Members: This side menu widget lists all the recent, popular and active members.
(BuddyPress) Recently Active Members: As the name suggests, this widget displays recently active members.
(BuddyPress) Who’s Online: Being online does not mean that the user is also active. This widget helps the other users see other online members.
(BuddyPress) Primary Navigation: This show activity and mentions to all the users. This is the primary navigation and should be visible at the top of all other widgets.
Step 6: Enable User Registrations on Website.
In the case of a public social network, user registration should be open to all visitors. However, if the network is private, you can either turn off the registration completely or better yet, make the process invitation-only.
For making the registration process public, navigate to Settings → General → mark Anyone can register.

Step 7: Setting up the Front Page
Finally, the last and the most important part of the process is to set a front page of your website. When a visitor comes to your website, this is the first page they will see.
In this example, I have set the “activity” page as the front page of my website. For this, go to Settings > Reading.
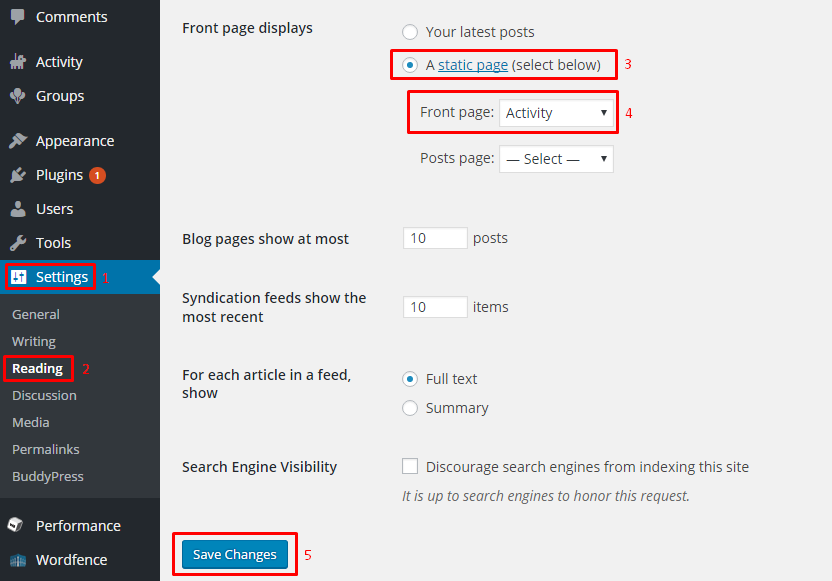
Now click Save Changes button. Your very own social website powered by the WordPress BuddyPress plugin is now ready for visitors.
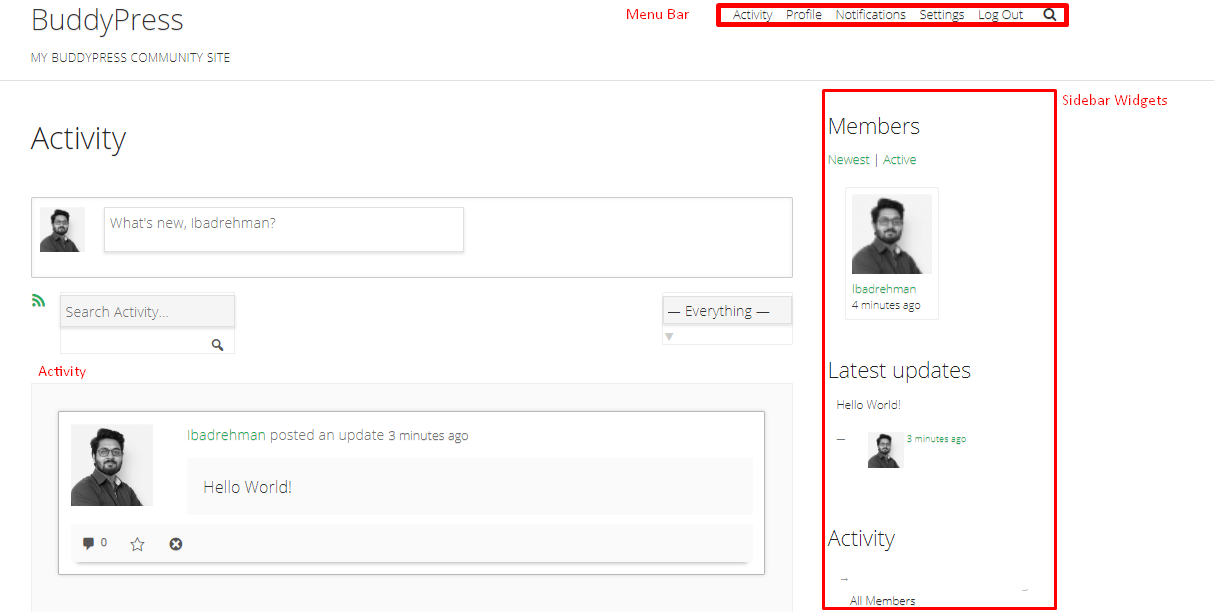
Since I have selected the ‘Activity’ page as the front page, the visitors can see the current activity right after visiting the website. On the top, I have the BuddyPress menu with options such as Notifications, Settings, and Profile.
On the right side menu all the widgets are listed in the order I added them, and on the main section of the page, I have the activity stream that is updated in real time.
I am running my social network without any trouble with Varnish-enabled on my Cloudways managed server. However, if you encounter an issue, and the problem is a specific page, go ahead and exclude those URLs from the Varnish settings. If the issue persists, either disable the Varnish from Cloudways server dashboard or contact the 24/7 live chat support.


- Week-1 Digital and Social Media Overview, Theories and Global Digital Media Industry
- Week-2 Internet media and globalization: concepts and theories
- Week-3 Technology and culture: debates
- Week-4 Researching social networking sites (SNSs), regulation, gatekeeping and ethics-case studies
- Week-5 Public communication campaigns and global humanitarianism
- Week-6 Multiplatform journalism, transnational citizen journalism, grassroots activism and change
- Week-8 Midterm Exam (Term paper )
- Week-9 Dealing with Social Media, Building a WordPress powered website
- Week-10 Introduction to Search Engine Optimization (SEO), Creating a blog
- Week-11 Learning the language of twitter, Guide to Facebook, Guide to Youtube
- Week-12 Introduction to Google, Google Analytics, LinkedIn, Email Marketing: creating an email list
- Week-13 Storification, How to bring traffic to your stories, Building your online brand
- Week-14 Ethics of social media, Social media conglomerates
- Week-15 Media and cultural theory, The history and philosophy of media technology
- Week-16 New media, Contemporary digital media developments in the UK, USA and China, Global media and journalism
- Week-17 Final Term Exam
- Week-7 Presentations
- Chapters 17
- Department Communication and Media Studies
- Teacher
Mr. Abdul Rehman Qaisar
